This article explains how to perform the initial setup of your weoInvoice account, step by step. The basic configuration is the same across all plans (Business, Exclusive, and Exclusive Plus). Throughout the article, we highlight the additional features available with the Exclusive and Exclusive Plus plans.
Prerequisites
Before you begin, have the following company information ready:
-
Company name, email address, and Tax Identification Number (TIN)
-
Full address and postal code
-
Business type (Service Provider or Retailer/Street Vendor)
-
Applicable VAT rates (Standard, Intermediate, Reduced)
-
Withholding tax percentage, if applicable
Initial Setup (all plans)
1. Access Configuration from the top menu of your weoInvoice account.
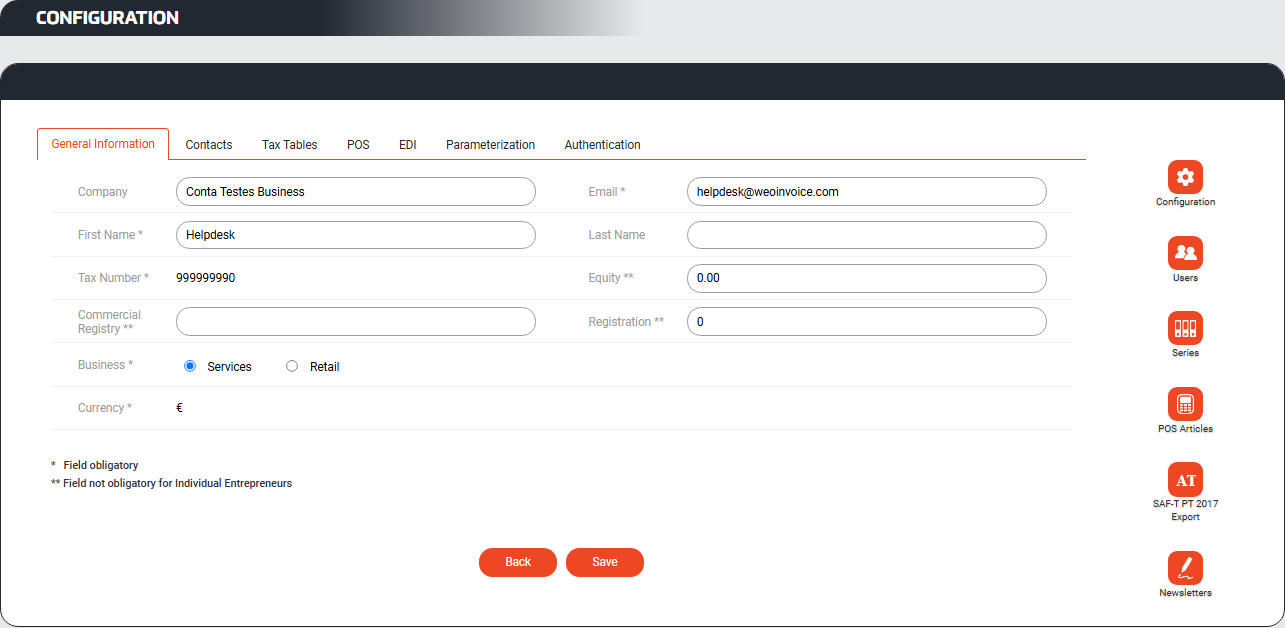
Identification tab
2. Fill in the company identification details: company name, email address, TIN, business type, and currency.
3. If applicable, also complete the fields for Share Capital, Commercial Registry Office, and Registration Number. These fields are mandatory for companies and optional for sole traders.
4. Save your changes.
Note: You will find the Cash IVA Scheme option in this tab. Enable it only if your company operates under this tax regime.
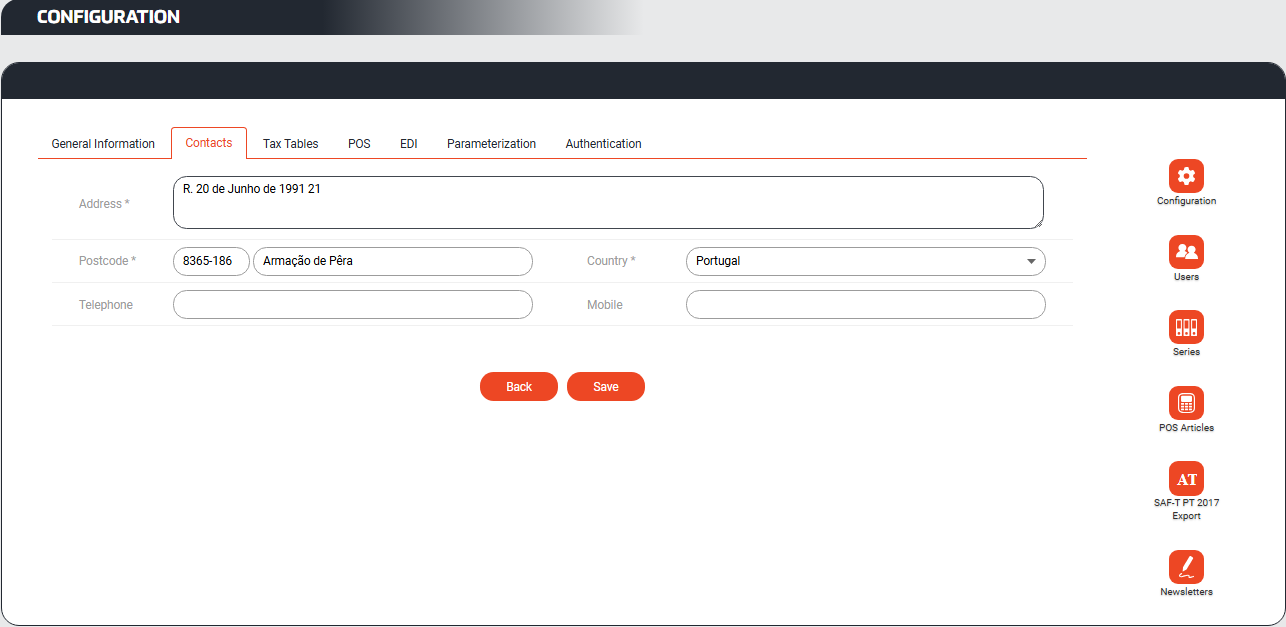
Contacts tab
5. Enter the address, postal code, country, and contact information (telephone and mobile number). This information will appear on your invoices.
6. Save your changes.
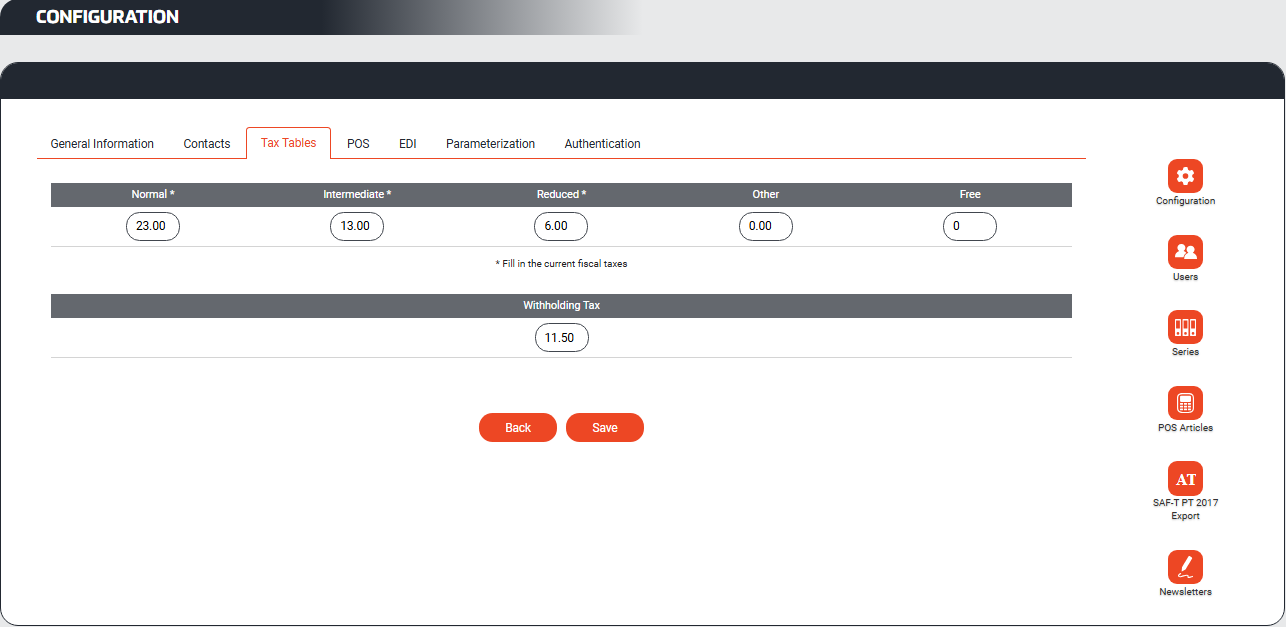
Tax Tables
7. Enter the applicable VAT rates in the corresponding fields (Normal, Intermediate, Reduced, Other).
Important note: You should always complete the VAT fields, regardless of whether you use those rates in your products or services. The withholding tax field only applies to service invoicing.
8. Save your changes.
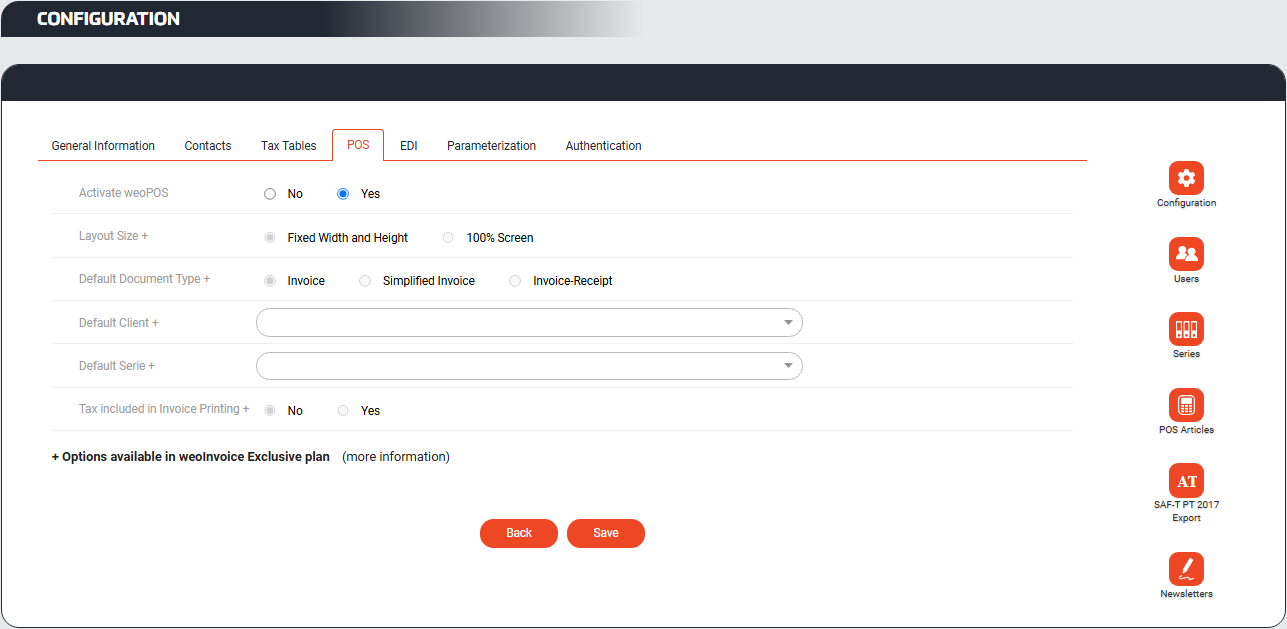
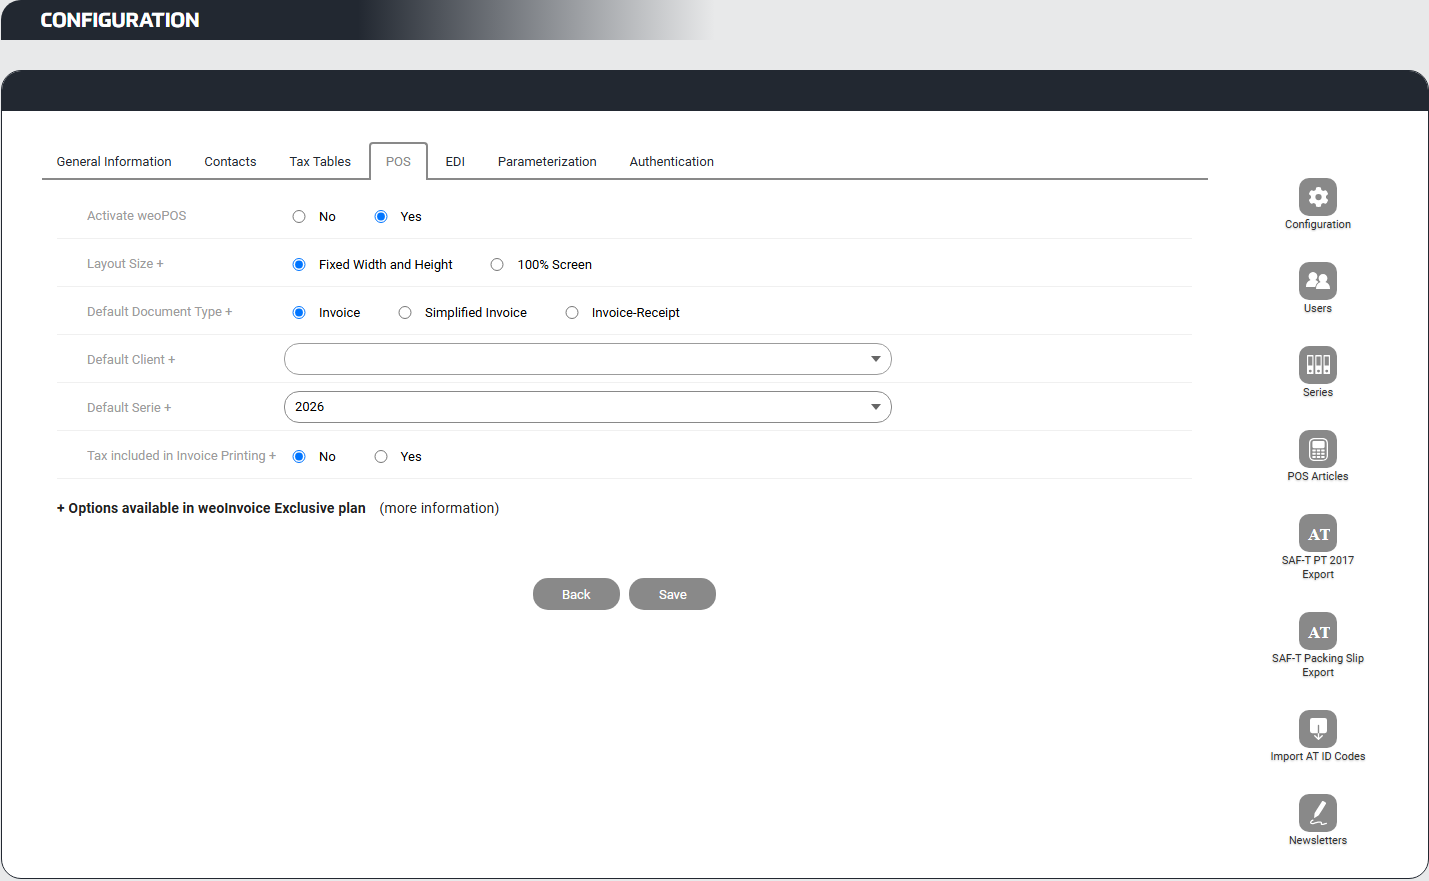
POS tab
9. Enable or disable weoPOS according to your needs.
In the Business plan, POS options are limited to enabling or disabling the feature.
Note (Exclusive and Exclusive Plus plans): These plans provide access to additional POS settings, including: interface size, default document type, default customer, default series, receipt printing with VAT included.
Parameterization tab
10. In the Business plan, the Parameterization tab only allows you to choose whether prices should be displayed when printing Transport Documents.
Note (Exclusive and Exclusive Plus plans): These plans include additional features:
-
Alternative Dispute Resolution (ADR) - You can include ADR information on your documents in accordance with Portuguese Law No. 144/2015.
-
Portuguese Tax Authority (Exclusive Plus only) - You can configure automatic communication with the Portuguese Tax Authority via Webservice for series, invoicing and transport documents. For more details, see the article Automatic communication with the Tax Authority via Webservice.
-
Payments (Exclusive Plus only) - You can configure integration with Ifthenpay for Multibanco references and Pay By Link. For more details, see the article Pay By Link | Multibanco References - A Practical Solution for Online Payments.
-
API Integrations (Exclusive Plus only) - You can enable integrations with e-commerce platforms and partners, including: Shopify, WooCommerce, QuotaGest, Something Apps, Dori.finance and nopCommerce.
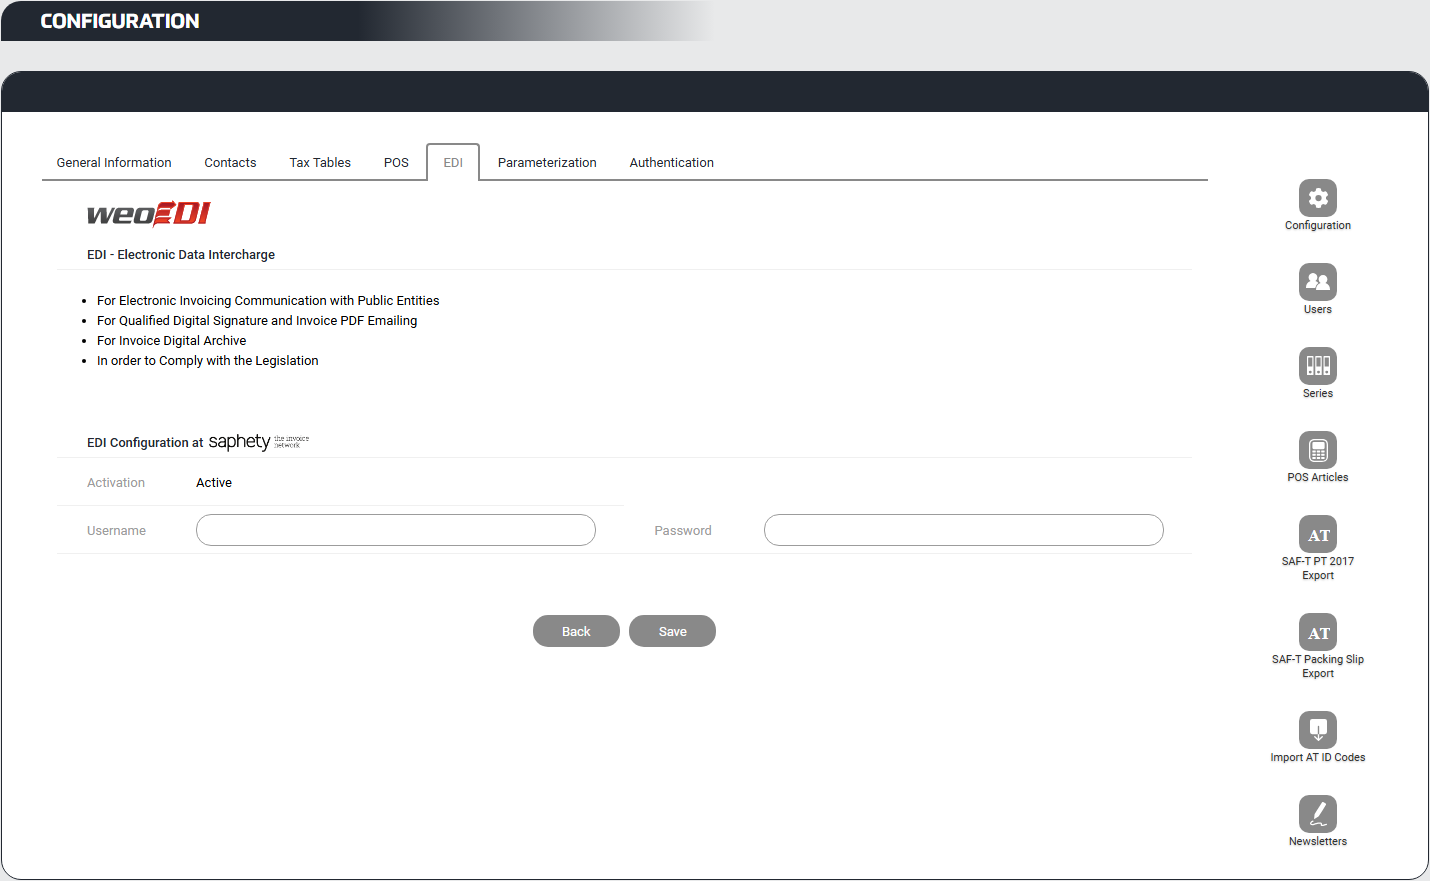
EDI tab (Exclusive Plus only)
11. If you require electronic invoicing, enter your Saphety account details to enable Electronic Data Interchange (EDI) functionality.
Authentication tab
12. In this tab, you can change the password used to access your weoInvoice account.
Additional options in the side menu
Within the Configuration area, you can also access the following options:
-
Users – Manage users who have access to your account.
-
Series – Create and manage document series.
-
POS Items – Configure items for use at the point of sale.
-
SAF-T PT 2017 Export – Export the SAF-T file for submission to the Portuguese Tax Authority (available in all plans).
-
SAF-T Packaging Slip Export (Exclusive and Exclusive Plus plans) – Export the specific SAF-T file for transport documents.
-
Import AT ID Codes (Exclusive and Exclusive Plus plans) – Import identification codes obtained through the e-Fatura portal.
-
Email (Exclusive Plus only) – Configure the email template used to send documents to your customers.
-
Newsletters – Manage newsletter preferences.
Expected Result: Once all sections have been completed and saved, your account will be ready to issue documents. You can confirm that the setup is complete by verifying that all tabs contain the required information, the current year's series is active and that the ATCUD validation codes have been entered for the active series.
Frequently Asked Questions
Do I need to complete all sections before I can start invoicing? The mandatory fields (marked with an asterisk *) must be completed before you can access the weoInvoice features.
To start issuing invoices, you must have the validation codes (ATCUD) configured for the annual series.
The Parameterization, EDI, and API Integrations sections can be configured later according to your needs.
What are the differences in configuration between the plans? The basic configuration (Identification, Contacts, and Tax Tables) is the same across all plans.
The Exclusive plan adds: Cash IVA Scheme, Advanced POS options, Alternative Dispute Resolution (ADR) and SAF-T export for Transport Documents.
The Exclusive Plus plan additionally includes: Automatic communication with the Portuguese Tax Authority, EDI/Saphety integration, Payment methods, API integrations with e-commerce platforms and Email configuration.
Can I change the Configuration after I start issuing documents? You can modify all configuration fields except the Tax Identification Number (TIN) and the document series.
 . This is a system that is constantly evolving and you are an essential piece in this evolution.
