This article explains how to configure invoice scheduling in weoInvoice, allowing your recurring invoices to be issued automatically according to the frequency you define. This feature is available to users subscribed to the Exclusive or Exclusive Plus plans.
Prerequisites: Before you begin, make sure that:
-
You have the Exclusive or Exclusive Plus plan active on your weoInvoice account.
-
The customer you intend to invoice is already registered in your account.
How to configure an invoice schedule:
1. Access Invoices from your account menu.
2. Click Add.
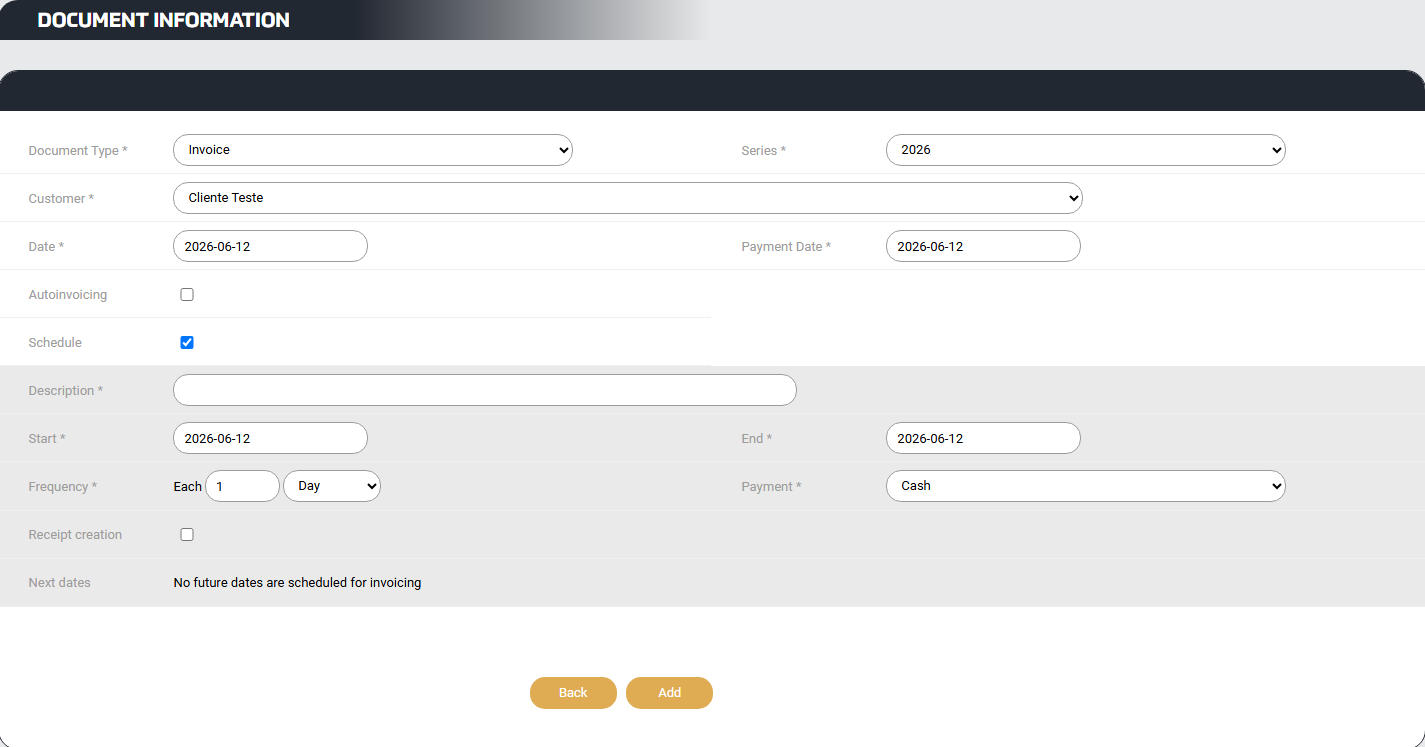
3. Fill in the document fields: select the document type, series, and customer.
4. Enable the Schedule option by clicking the corresponding checkbox.
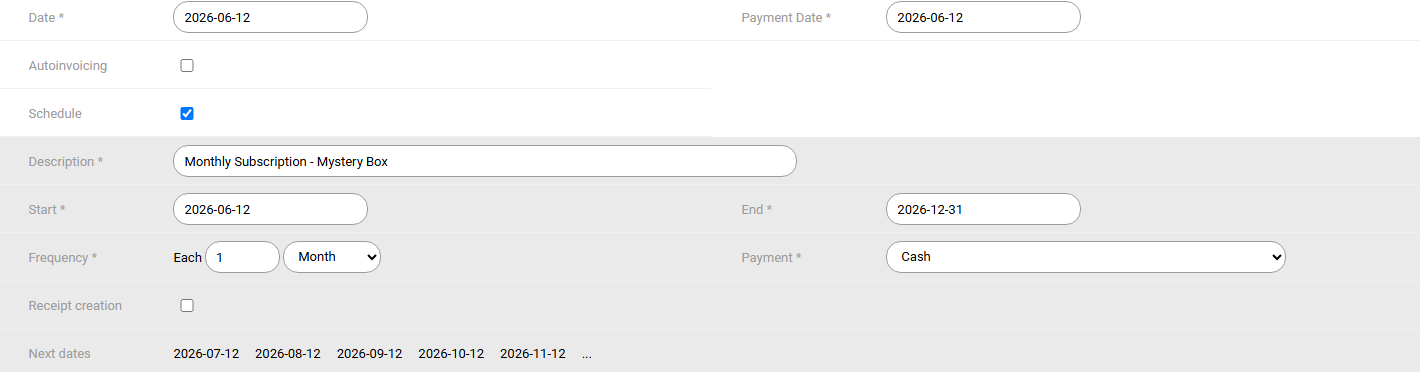
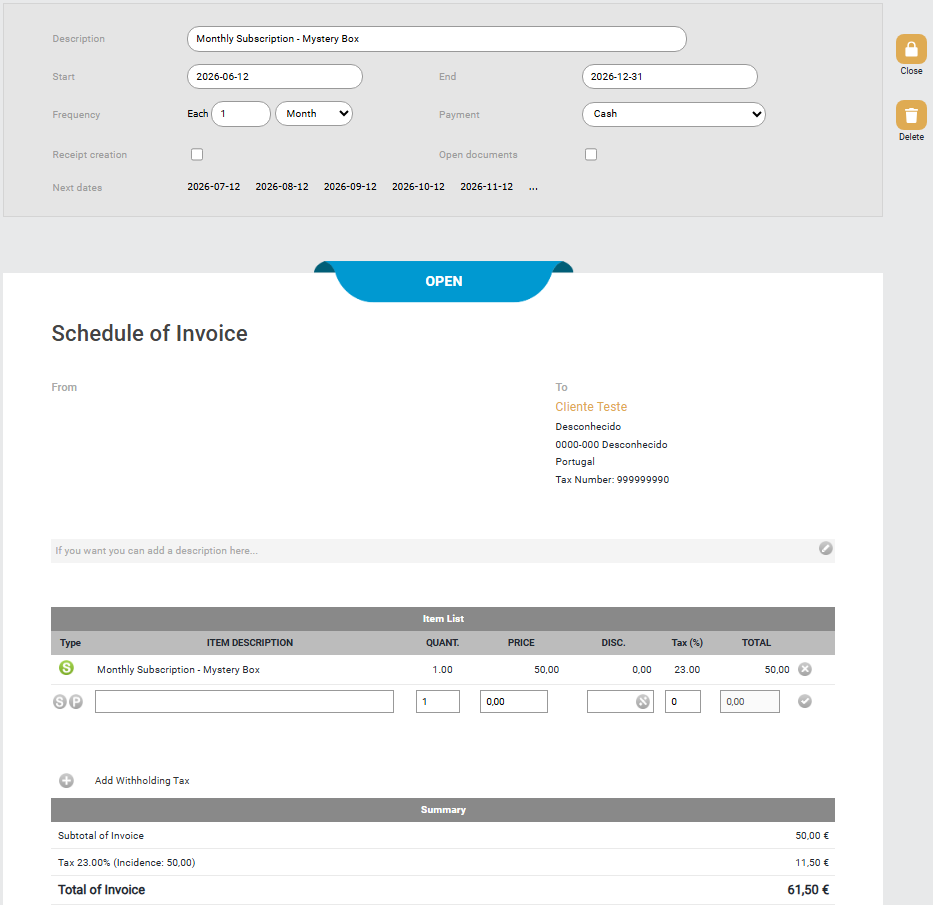
5. Fill in the Description field with a reference that identifies the schedule (for example: “Monthly subscription - Mistery Box”).
6. Define the Start and End dates of the schedule.
Important note: The first scheduled invoice will be issued in the period following the start date. For example, if you define the start date as June 12 with a monthly frequency, the first automatic invoice will be issued on July12.
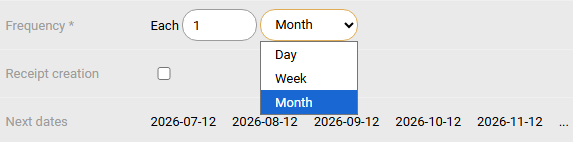
7. Select the desired Frequency. You can choose between daily, weekly, or monthly issuance and define the interval (for example: every 1 month, every 2 weeks).
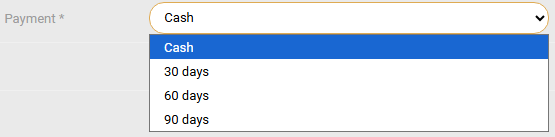
8. Select the Payment type for the scheduled invoices. The available options are: Immediate Payment (Cash), 30 days, 60 days, or 90 days.
9. Confirm the expected issuance dates displayed by the system in the Next dates field to ensure everything matches your intended setup.
10. Click Add to proceed.
11. Fill in the document details (items, quantities, prices, and VAT) in the same way you would for a regular invoice.
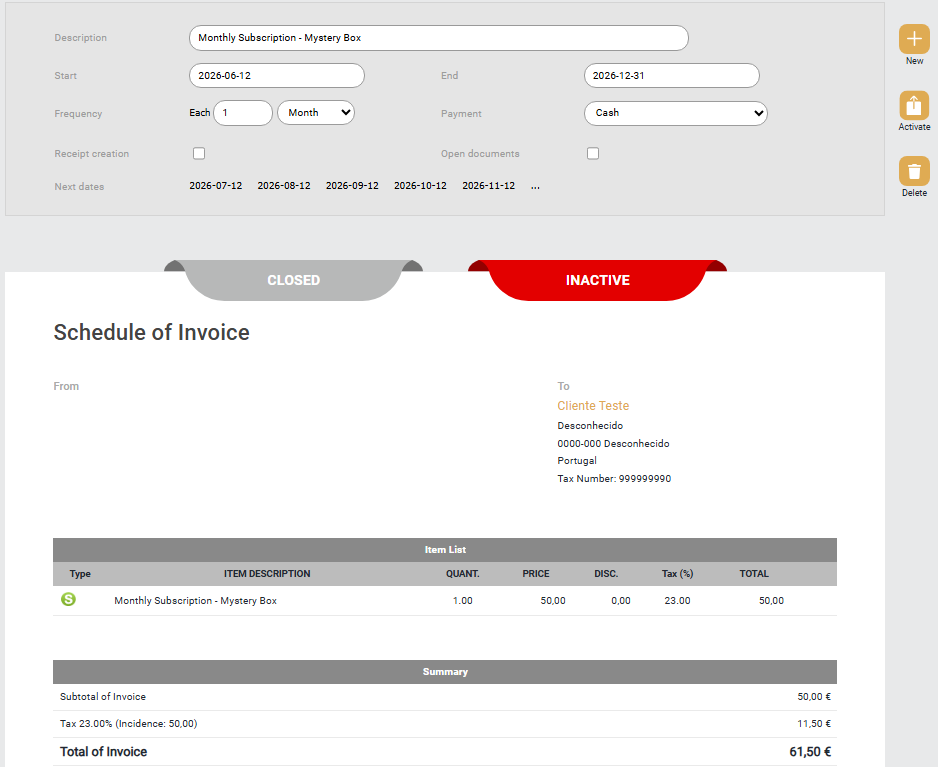
12. Click Activate to confirm and activate the schedule.
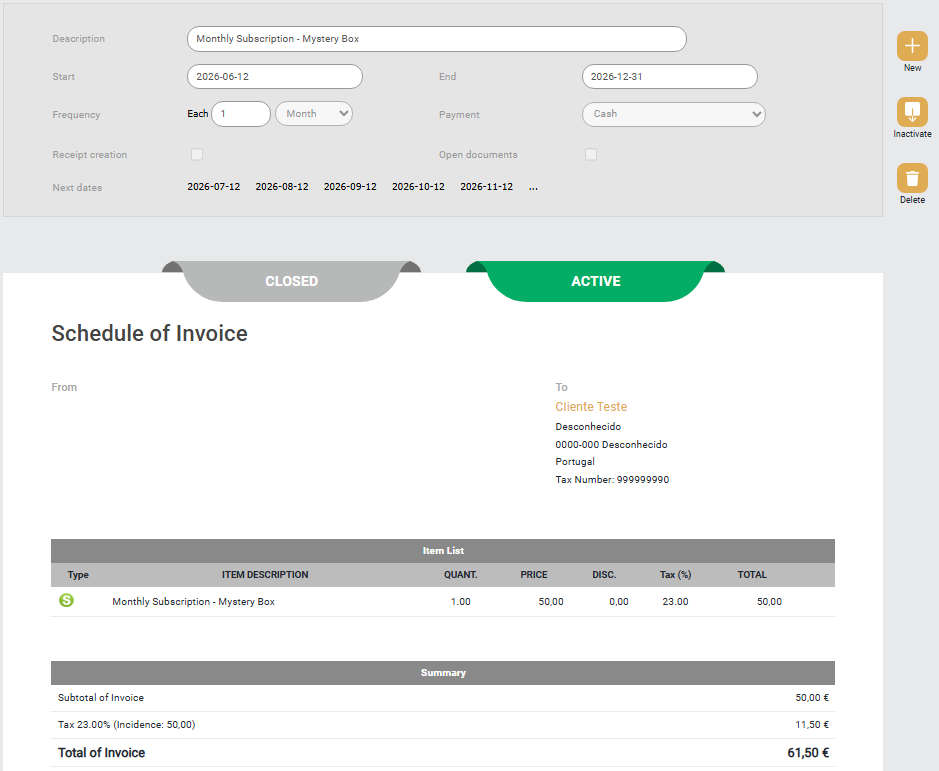
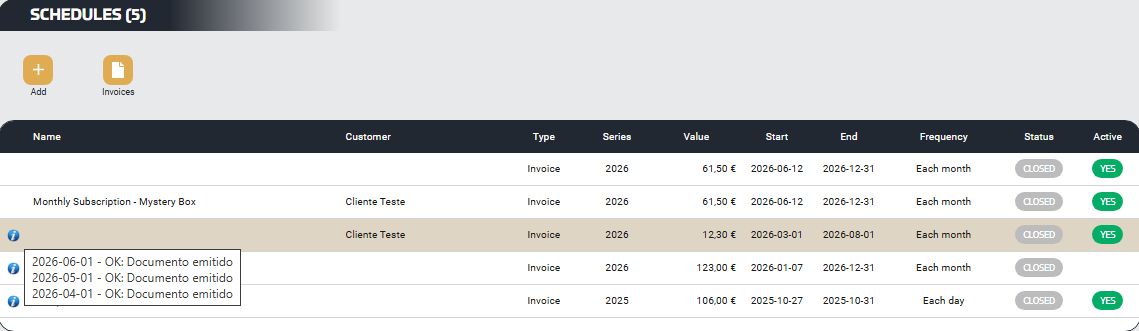
Expected result: If the process has been completed successfully, you will see the schedule listed under the Invoices tab, in the Schedules section, displaying the status, frequency, start and end dates, and the amount of each issuance. The invoices will then be issued automatically on the scheduled dates.
How to view created schedules:
To view your active schedules, access Invoices from the main menu. In the Schedules section, you will find a list of all schedules along with their respective details: customer, document type, series, amount, dates, and frequency.
Tip: It is recommended that you create a custom multi-year series for your scheduled documents. This helps avoid the need to reconfigure schedules every time the year changes.
Frequently asked questions
Can I use scheduling for any type of document? Yes. The scheduling feature is available for all types of invoices, as well as for quotes and transportation documents.
Can I edit or cancel a schedule after activating it? No. A closed schedule cannot be changed. You can, however, deactivate it, and delete it if there is an error, for example.
Is the Receipt Issuance option included in scheduling? The scheduling form includes a Receipt creation option, which allows automatic receipt issuance to be associated with scheduled invoices.

 . This is a system that is constantly evolving and you are an essential piece in this evolution.
